Installing DeepSeek-R1 1.5B on Synology
Balance between performance and resource efficiency, making it ideal for running on a Synology NAS with limited hardware compared to high-end AI servers.

Introduction to DeepSeek
DeepSeek is a powerful open-source AI model designed for natural language processing tasks. It comes in various sizes, ranging from lightweight models to large-scale versions optimized for complex computations. The DeepSeek-R1 1.5B model was chosen for this setup as it offers a balance between performance and resource efficiency, making it ideal for running on a Synology NAS with limited hardware compared to high-end AI servers.
If you want to see how Deepseek managed to work much more efficiently and Cost-Effectively see my previous post here → https://stadem.substack.com/p/deepseek-apple-researchers-explain
Now, before diving into the installation process, it's important to understand the hardware specifications of the Synology NAS and why they matter for running DeepSeek-R1 1.5B.
For this installation, I am going to use the Synology DS918+
Processor (CPU): Intel Celeron J3455 (4-core, 1.5 GHz base, up to 2.3 GHz burst)
Memory (RAM): Upgraded to 16GB DDR3L (Originally 4GB, expandable up to 8GB officially, but can support 16GB unofficially)
Storage: 2 x 250GB NVMe SSDs (RAID 1) used for read/write caching
This setup provides a balance between performance and efficiency, making it capable of running containerized applications efficiently.
Running Docker on Synology NAS
The Synology NAS DS918+ supports Docker, which allows running various containerized applications, including DeepSeek. The Docker package can be installed via Synology Package Center.
Choosing the DeepSeek Model
DeepSeek offers multiple models with varying parameter sizes, such as:
1.5B (1.5 billion parameters) – A lightweight version suitable for devices with limited resources.
6.7B – A more advanced version requiring significantly more RAM and compute power.
33B – A large-scale version designed for high-end GPUs and dedicated AI servers.
For this setup, the DeepSeek-R1 1.5B model was chosen due to its balance of performance and resource requirements. While larger models provide more accuracy and capabilities, they demand significantly more memory and swap space.
Preparing the NAS for DeepSeek Deployment
Ensure Container Manager / Docker is Installed:
Open the Synology Package Center.
Search for "Container Manager" and install it.
Configure Swap Space (if needed):
If running out of memory, adding swap space can help prevent crashes.
Pull DeepSeek from Ollama Library:
The DeepSeek models are available on Ollama's Library, which provides an easy way to download and deploy AI models.
Next steps: Setting up the container and running the DeepSeek model on the NAS.

Before doing any other action create on your file station the below folders
docker → deepseek
data
entrypoint
webui

Create entrypoint.sh
/volume1/docker/deepseek/entrypoint/entrypoint.sh
#!/bin/bash

# Starting server
echo "Starting server"
ollama serve &
sleep 1

# Splitting the models by comma and pulling each
IFS=',' read -ra MODELS <<< "$MODELS"
for m in "${MODELS[@]}"; do
    echo "Pulling $m"
    if ! ollama pull "$m"; then
        echo "Failed to pull $m"
        exit 1
    fi
    sleep 5
done

# Keep the container running
tail -f /dev/null
Don’t forget to change file permissions
chmod +x /volume1/docker/deepseek/entrypoint/entrypoint.sh
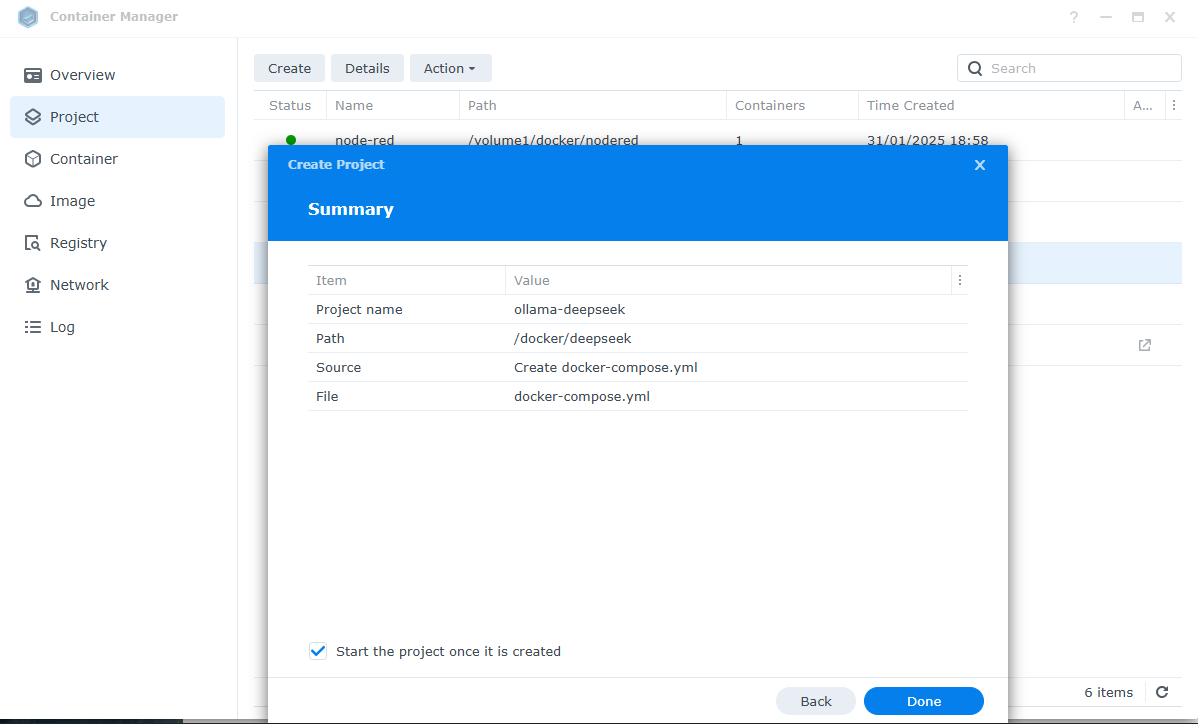
Then create a new project with the docker-compose.yml with the code below
services:
  webui:
    container_name: OLLAMA-WEBUI
    image: ghcr.io/open-webui/open-webui:0.5
    volumes:
      - /volume1/docker/deepseek/webui:/app/backend/data:rw
    environment:
      OLLAMA_BASE_URL: http://ollama:11434
      WEBUI_SECRET_KEY: eCugpxiYYaBlmvICbpxMkuibDJqGGKTYgUYjXZKGDpGuISpIGTcLvwbidlhJvIIj
    healthcheck:
      test: timeout 10s bash -c ':> /dev/tcp/127.0.0.1/8080' || exit 1
      interval: 10s
      timeout: 5s
      retries: 3
      start_period: 90s
    ports:
      - 8271:8080
    restart: on-failure
    depends_on:
      ollama:
        condition: service_started

  ollama:
    container_name: OLLAMA-DEEPSEEK
    image: ollama/ollama:latest
    entrypoint: ["/usr/bin/bash", "/entrypoint.sh"]
    volumes:
      - /volume1/docker/deepseek/data:/root/.ollama:rw
      - /volume1/docker/deepseek/entrypoint/entrypoint.sh:/entrypoint.sh
    environment:
      MODELS: deepseek-r1:1.5b
      OLLAMA_INSTALL_MODELS: deepseek-r1:1.5b
      OLLAMA_HOSTNAME: deepseek.your-synology-domain.synology.me
    ports:
      - 11434:11434
    healthcheck:
      test: ["CMD", "ollama", "--version"]
      interval: 15s
      timeout: 10s
      retries: 2
      start_period: 30s
    restart: on-failure:3
WEBUI_SECRET_KEY: Create your token here
OLLAMA_HOSTNAME: Change to your Synology hostname
* Tip, MODELS Pull multiple models using , i.e. “deepseek-r1:1.5b,mistral:7b-q4_0“

Select Next and Done and wait a couple of minutes for the installation to be done.


Done, login here → http://IP or host:8271/auth
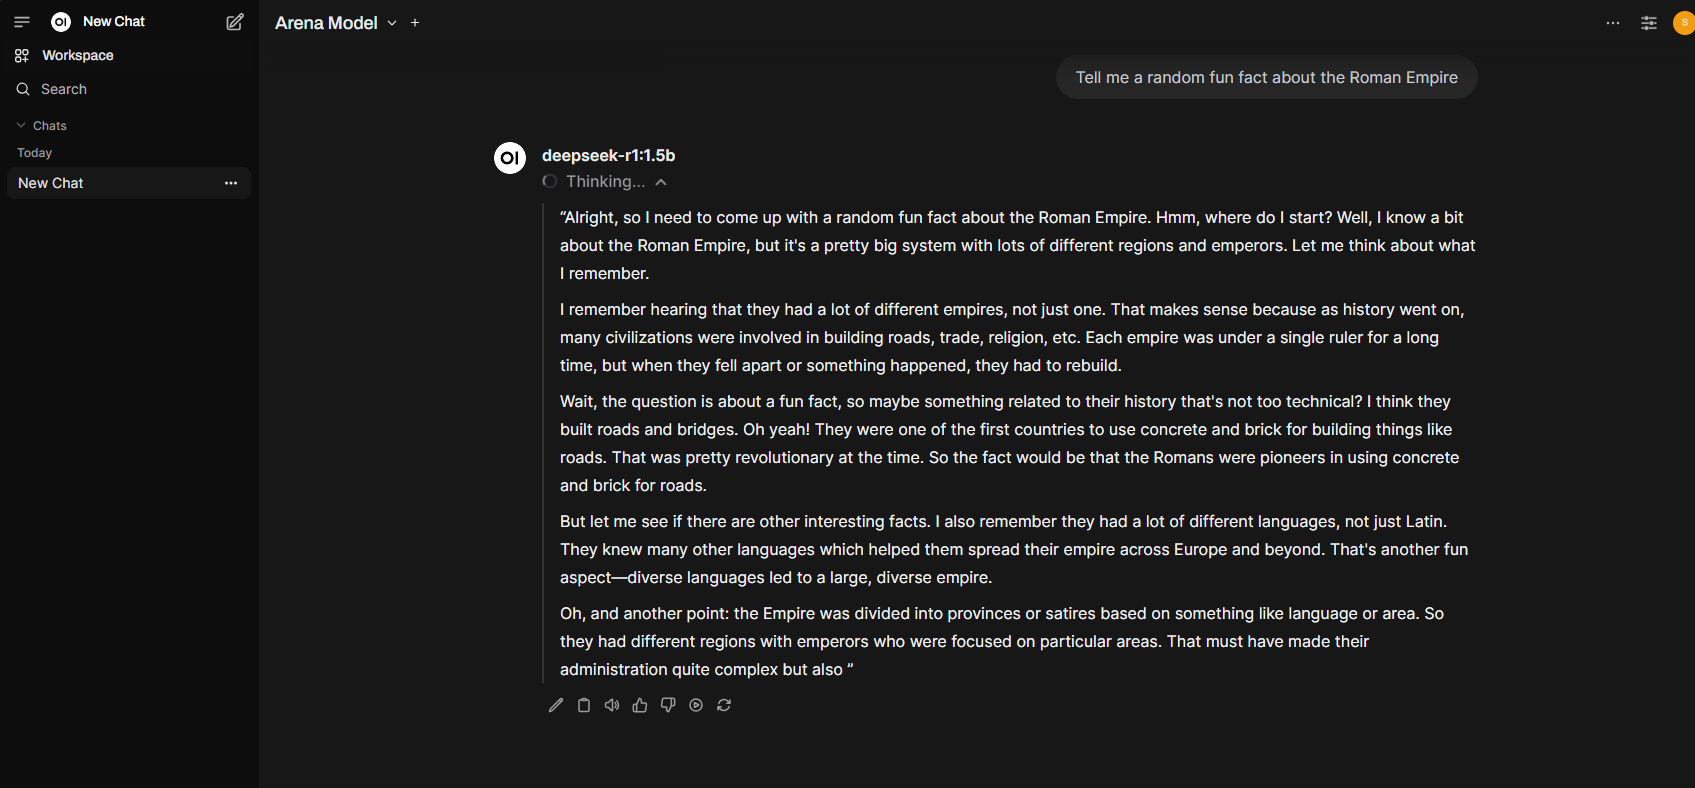
What fascinates me is the thinking process—the way the model works.
Initial Context Understanding: The AI recognizes the question and starts by recalling relevant historical knowledge about the Roman Empire.
Idea Generation: It considers various angles, such as governance, infrastructure, and language diversity.
Refinement and Prioritization: It identifies an interesting and accessible fact—the use of concrete and bricks for roads.
Expanding on the Topic: The AI attempts to provide additional relevant details, such as the role of diverse languages and administrative divisions.
Progressive Construction: The response is built iteratively, refining its ideas as it "thinks" through the information.
This step-by-step reasoning reflects how AI models process questions and generate responses based on their training data and underlying algorithms.
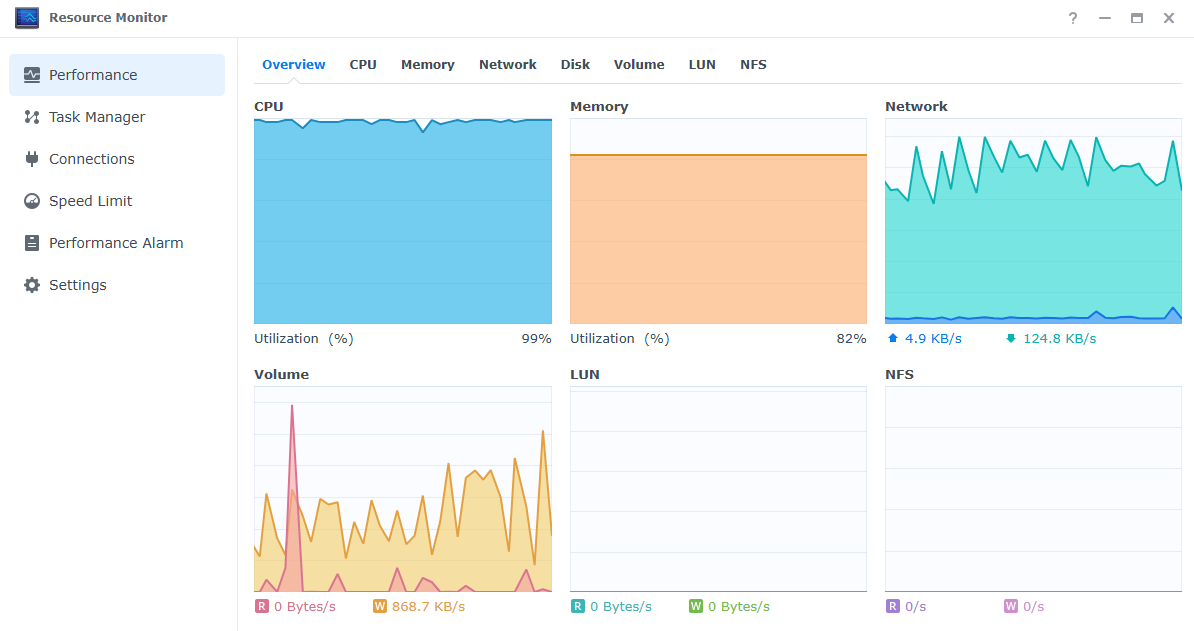
Summary Interpretation
The system experienced a significant CPU load increase, which remained sustained.
The memory is also under considerable usage, though not maxed out.
Disk activity suggests potential heavy writing operations.
If the high CPU usage persists, it is advisable to check running processes and background tasks, disabling any virtual machines or resource-intensive processes as needed.